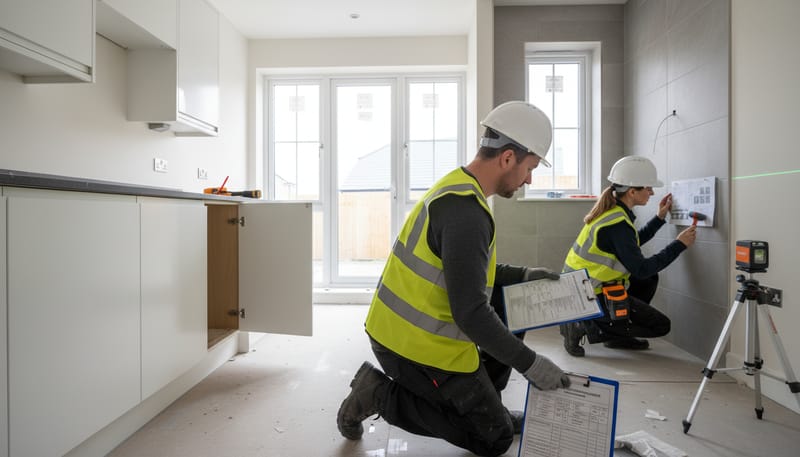
Before You Start: What You'll Need
You don't need professional equipment, but a few basic items will help you inspect more thoroughly:
- Torch — essential. Shine it at a low angle across walls and ceilings to reveal bumps, dips, and imperfections in plastering and paintwork that are invisible under normal lighting
- Phone or camera — photograph every defect, ideally with something for scale (a coin or your finger)
- Notepad or this checklist printed out — note the room and exact location of each issue
- Spirit level (optional but helpful) — check worktops, windowsills, and floors for level
- A marble or small ball — place on hard floors and windowsills to check for obvious slopes
- Step ladder — for checking the loft hatch and higher fittings
- Blue painter's tape or sticky notes — mark defect locations on walls and fittings so you can find them again
Best Conditions for Inspecting
- Inspect during daylight hours — natural light reveals more than artificial
- Turn all lights on as well, to check every fitting works and to provide cross-lighting
- Turn the heating on an hour before you start — you need to check every radiator gets hot
- Run hot water for 5 minutes before you start — check the boiler fires up and water reaches temperature
- Allow 3-5 hours for a thorough inspection of a 3-4 bedroom house
General Checks (Apply to Every Room)
Run through these checks in every single room before moving to the room-specific items:
Walls and Ceilings
- Shine your torch at a low angle across every wall — look for bumps, ridges, and uneven plaster
- Check for cracks, especially at corners, above doors, and around windows
- Look for nail pops (small circular bumps where plasterboard nails are pushing through)
- Check paintwork is even with no missed patches, runs, drips, or brush marks
- Ensure paint colour is consistent — no touch-up patches that don't match
- Check ceilings for sagging, cracking, or uneven artex/texture
- Inspect all corners — they should be straight and crisp, not wavy
Skirting Boards and Architraves
- Check all skirting boards are firmly fixed (push gently — they shouldn't move)
- Look for gaps between skirting and wall, or skirting and floor
- Check mitre joints at corners — they should meet cleanly with no gaps
- Inspect for scratches, dents, and paint drips on skirting
- Check architraves around doors sit flush and have clean mitred corners
- Ensure caulk/filler along the top edge of skirting is neat and continuous
Doors
- Open and close every door — it should move freely without catching the frame or floor
- Check the gap around the door is even on all sides (approximately 2-3mm)
- Test the latch — it should click firmly into the strike plate
- Check handles operate smoothly from both sides
- Inspect hinges — no paint on them, screws tight, no squeaking
- Check the door stops (if fitted) — the door shouldn't hit the wall
- Look for scratches, dents, or paint drips on door faces and edges
- Ensure the bottom edge of the door is sealed/painted (often missed)
Windows
- Open and close every window — check all locking positions work
- Test restrictors on upper-floor windows (safety requirement)
- Check trickle vents open and close
- Look for scratches or damage to glass panes
- Inspect rubber seals around the frame — no gaps or deformation
- Check drainage slots at the bottom of the frame are clear (not painted over)
- Look for condensation between double-glazed panes (indicates seal failure)
- Check internal sills are level and securely fixed
- Inspect sealant around the frame where it meets the wall — should be neat and continuous
Electrical
- Test every socket with a phone charger or lamp — all should work
- Check sockets and switches are straight and flush to the wall (not at angles)
- Ensure face plates are not cracked or scratched
- Test every light switch — check two-way switches work from both positions
- Check dimmer switches operate smoothly through their range
- Inspect ceiling light fittings — secure, straight, no gaps around the rose
Flooring
- Walk slowly across the entire floor — listen and feel for squeaks, creaks, or bouncy spots
- Check carpet is properly fitted to edges with no lifting or bubbling
- Inspect carpet for stains, pulls, or damage from construction work
- For hard floors, check tiles for cracks, chips, or hollow sounds (tap gently)
- Check threshold strips between rooms are secure and don't present a trip hazard
- Look at floor/skirting junctions — gaps suggest floor wasn't fitted properly
Heating
- Check every radiator gets hot across its full surface (cold spots indicate air or balancing issues)
- Ensure radiator valves (TRVs) respond — turn up and down, feel for temperature change
- Check radiators are level and securely fixed to the wall
- Look for paintwork damage around radiator brackets
- If underfloor heating is fitted, check each zone responds to its thermostat
Kitchen Checklist
Units and Worktops
- Open and close every cupboard door — check alignment, soft-close function, and that they sit flush when closed
- Pull out every drawer — check runners are smooth and drawers close fully
- Check all handles are straight, tight, and consistently positioned
- Inspect worktop surface for scratches, chips, or stains
- Check worktop joints — they should be tight with no visible gap or lippage
- Run a spirit level along the worktop — it should be level
- Check the worktop edge where it meets the wall — should be sealed with a neat bead of silicone or an upstand
- Inspect inside every cupboard — look for rough cuts, unfixed shelves, and debris
- Check plinth boards are secure and straight along the base of the units
Sink and Taps
- Run both hot and cold taps — check flow rate and that hot water reaches temperature
- Fill the sink and drain it — water should drain quickly with no slow-draining or gurgling
- Check under the sink for leaks while water is running
- Inspect silicone seal around the sink — should be neat with no gaps
- Check the overflow works (fill the sink to the overflow hole — water should drain away)
- Test any pull-out spray function
Appliances
- Test the oven — turn it on, check it heats, check the door seal
- Test the hob — every ring/burner, including ignition on gas hobs
- Run the extractor fan on all speeds — check it's not excessively noisy and actually extracts (hold a tissue to the vent)
- Test the dishwasher if fitted — run a short cycle and check for leaks
- Check the fridge/freezer space — confirm water and electrical connections are accessible
- Test any integrated washer/dryer if fitted
Tiling and Splashbacks
- Check all tiles are firmly fixed (tap gently — hollow sounds mean poor adhesion)
- Inspect grout lines — should be consistent, no gaps or crumbling
- Look for cracked or chipped tiles
- Check the junction between tiles and worktop is sealed
- Inspect tile edges and end pieces — should be neatly cut with trim strips where exposed
Bathroom and En-Suite Checklist
Repeat these checks for every bathroom, en-suite, and WC in the property.
Bath and Shower
- Run the shower at full power for 2-3 minutes — check pressure, temperature, and that the enclosure doesn't leak
- Fill the bath and drain it — check drainage speed and look under the bath panel for leaks
- Check the bath panel is secure and removable (you'll need access for future maintenance)
- Test the shower screen or door — should open/close smoothly, seals should be intact
- Check silicone seals around the bath edge, shower tray, and screen — should be neat, continuous, and mould-free
- Test the thermostatic mixer (if fitted) — it should limit maximum temperature
- Check the shower head bracket holds the handset securely
Toilet
- Flush the toilet — check it fills and flushes correctly, no running water after the flush completes
- Check the toilet is securely fixed to the floor (gently try to rock it — it shouldn't move)
- Inspect the seal at the base — should be silicone, neat, and complete
- Check the seat — should be firmly attached, not sliding sideways
- For concealed cisterns, check the flush plate is secure and both buttons work (full and half flush)
Basin
- Run both taps — check flow and temperature
- Fill and drain — check drainage speed
- Check the overflow works
- Inspect silicone around the basin where it meets the vanity or wall
- Check the waste plug mechanism (pop-up or click-clack) operates correctly
- Look under the basin for leaks while water is running
Tiling
- Check all tiles are firmly fixed — tap to identify hollow tiles
- Inspect grout for gaps, crumbling, or inconsistent colour
- Check tile cuts around pipes, fittings, and edges are neat
- Look for cracked or chipped tiles (especially floor tiles)
- Check silicone where tiles meet the bath, shower tray, and basin — must be watertight
Ventilation
- Check the extractor fan works (hold a tissue to it — should be pulled towards the vent)
- Verify it runs on a timer after the light is switched off (building regulation requirement for windowless bathrooms)
- Check for any window — ensure it opens and closes correctly
Other
- Check towel rail / heated rail works and is securely fixed
- Test the mirror light and shaver socket (if fitted)
- Check all accessories (toilet roll holder, hooks) are firmly fixed
- Inspect the floor for any signs of water damage or staining from construction
Bedroom Checklist
Repeat for every bedroom including the master and any dressing rooms.
Built-in Wardrobes (if fitted)
- Open and close all wardrobe doors — check alignment and smooth operation
- For sliding doors, check they slide freely and stay on track
- Check shelves are level and secure
- Check hanging rails are firmly fixed (pull down gently to test)
- Inspect internal finish — look for rough edges, unfilled screw holes, or damage
- Check soft-close mechanisms work on hinged doors
Bedroom-Specific
- Check there are enough sockets in practical positions (not all behind where the bed will go)
- Test TV aerial/satellite points with a detector or by connecting a TV
- Check phone/data points if specified
- Test any USB charging sockets
- Inspect the window — pay particular attention to upper-floor window restrictors (safety requirement)
- Check loft hatch access if located in a bedroom (should open smoothly, have a proper catch, and be insulated)
Living Room and Reception Rooms Checklist
Fireplace (if fitted)
- For gas fires: check it ignites, flames are even, and the glass front is undamaged
- For electric fires: check all settings work
- Check the surround is level, firmly fixed, and undamaged
- Check the hearth is secure with no loose tiles or stone
Living Room-Specific
- Check TV point locations — ensure aerial, satellite, and data sockets are where you'd expect
- Test every socket, especially any recessed floor sockets
- Check patio or French doors open, close, and lock correctly from both sides
- For bi-fold doors: check every panel opens and folds cleanly, locking points all engage, threshold strip is secure, and drainage channel is clear
- Check the floor under large windows for any signs of water ingress or discolouration
Hallway, Stairs, and Landing Checklist
Entrance Hall
- Check the front door locks from inside and outside with all keys provided
- Test the doorbell
- Check the door opens fully without catching on the floor or frame
- Inspect the threshold — should be weathertight with no draft
- Check any glazed panels in the door for scratches or seal issues
- Test the door chain and spy hole if fitted
- Check the consumer unit — should be labelled with each circuit clearly identified
- Locate the stopcock and check it turns (usually under the kitchen sink but sometimes in the hallway)
- Check the gas meter cupboard opens (if applicable)
Staircase
- Walk up and down slowly — check for squeaks and movement on every tread
- Check the handrail is firmly fixed along its entire length (pull firmly)
- Check spindles/balusters — none should be loose or rotate. The gap between them must be less than 100mm (building regulation requirement — a 100mm sphere shouldn't pass through)
- Check the newel posts are solid (no movement when pushed)
- Inspect stair carpet fitting — should be taut with no lifting at the nosing
- Check the understairs cupboard door, light, and internal finish
Landing
- Check landing floor for squeaks
- Test smoke detectors — press the test button on each one (there should be one on every floor)
- Check the loft hatch if located here — should open smoothly, sit flush when closed, and have insulation on the back
- Check landing light and any two-way switches work from both top and bottom of stairs
Loft Checklist
If you can safely access the loft, this is one of the most important areas to inspect. Many defects hide here.
- Check insulation is laid evenly and covers the entire ceiling area — minimum 270mm depth for new builds
- Ensure insulation isn't blocking eaves ventilation (there should be a gap at the edges)
- Look for daylight coming through the roof — indicates missing or displaced tiles
- Check any visible roof timbers for damage, staining, or excessive notching
- Look at party wall fire stopping (where your loft meets the neighbour's) — should be solid with fire-rated material filling any gaps
- Check any water tanks are properly supported and insulated
- Look for construction debris — often left in the loft by trades
- Check any loft boarding is secure and doesn't compress the insulation (should be on raised legs)
- Inspect any visible pipework — should be insulated, especially in unheated loft spaces
- Check the loft hatch seal — should have an insulation pad and a draught seal
- If a loft ladder is fitted, check it extends and retracts safely
Safety note: Only walk on joists or properly installed loft boarding. Do not step on the plasterboard between joists — it will not support your weight.
Garage Checklist
- Check the garage door opens and closes smoothly — test manual and electric operation
- For electric doors, test the remote control and any key switch override
- Check the safety auto-reverse on electric doors (place an obstruction — it should stop and reverse)
- Inspect the garage floor — check for cracks, excessive slope, or poor surface finish
- Check the fire door between garage and house (if attached garage) — should be FD30 rated, self-closing, and seal properly
- Test the light and any sockets
- Check for a boiler or utility installations — ensure they're accessible with required clearance
- Look at the ceiling and walls — check for unfinished areas, exposed services, or poor plastering
- Check the consumer unit if there's a separate garage circuit
External Checklist — Front, Rear, and Sides
Walls and Brickwork
- Walk around the entire property — check brickwork for cracks, staining, or damaged bricks
- Inspect mortar/pointing — should be consistent, neat, and fully filling the joints
- Check for the DPC (damp-proof course) — a visible line in the brickwork, usually 150mm above ground level. Ensure the ground hasn't been built up above it
- Look at air bricks and vents — should be clear, not blocked with mortar or debris
- Check render (if applicable) — look for cracks, hollow patches (tap to test), and staining
- Inspect the junction between different materials (brick to render, brick to cladding)
Roof (From Ground Level)
- Look at the roofline — should be straight with no sagging or dipping
- Check for any obviously slipped, cracked, or missing tiles/slates
- Inspect ridge tiles along the top — should be straight and firmly bedded
- Check lead flashing around chimneys, dormers, and wall junctions — should be dressed neatly into the brickwork
- Inspect soffits and fascias — should be straight, properly fixed, and undamaged
Gutters and Drainage
- Check gutters are securely fixed and aligned (should slope gently towards downpipes)
- Look for any visible gaps or misalignment at gutter joints
- Check downpipes are secure, straight, and properly connected at the bottom
- During or after rain, check for any overflowing or dripping at joints
- Inspect gully drains at ground level — should be clear and draining freely
- Check any visible drain covers are level with the surrounding surface and can be lifted for access
Windows and Doors (External)
- Check external sealant (mastic) around all window and door frames — should be neat, continuous, and properly adhered
- Inspect window sills — should slope away from the building so water drains off
- Check all external doors lock and unlock correctly
- Inspect the threshold of external doors — should be weathertight
Driveway, Path, and Patio
- Check the driveway surface for cracks, unevenness, or poor finish
- Ensure the driveway slopes away from the house (not towards it)
- Check block paving is level and properly sand-filled at joints (if applicable)
- Inspect paths for cracks, trip hazards, and proper falls away from the building
- Check the patio surface and that there's a step down from the house (usually at least 150mm below the DPC)
Garden and Boundaries
- Check fencing is complete, straight, and firmly fixed
- Check fence posts are vertical and secure
- Inspect any boundary walls — check for cracks and that the coping stones are mortared
- Check gates operate correctly and latch securely
- Check outside taps work (if fitted)
- Check external power sockets work (if fitted)
- Test any external lighting
- Check the garden has been levelled and turfed/seeded as specified
- Inspect any retaining walls for cracks or movement
Utility Room / Boiler Cupboard Checklist
- Check the boiler fires up and produces hot water and heating
- Read the boiler pressure gauge — should be between 1 and 1.5 bar when cold
- Check all pipework connections for leaks
- Test the central heating programmer/timer — check you can set schedules
- Check the room thermostat responds (turn it up — boiler should fire; turn it down — boiler should stop)
- Locate the water stopcock and ensure it turns
- Check washing machine connections — hot, cold, waste all accessible
- Test any sockets and the light
- Check ventilation — a boiler room needs adequate airflow
- Ensure all boiler/appliance manuals and certificates are provided
Safety and Compliance Checks
These aren't cosmetic — they're legal and safety requirements that your new build must meet.
- Smoke detectors: One on every floor level (minimum). Test each by pressing the test button. Check they're interconnected — when one sounds, they all should.
- Carbon monoxide detector: Required in any room with a combustion appliance (gas boiler, gas fire). Test the button.
- Window restrictors: All openable windows above ground floor must have restrictors limiting the opening to 100mm (child safety requirement).
- Staircase gaps: The gap between balusters/spindles must be less than 100mm throughout.
- Glass safety markings: Any glazing in doors, side panels, or at low level should carry a BS EN 12600 safety mark (look in the corner of the glass).
- Fire door: The door between an integral garage and the house must be a fire door (FD30 minimum) with an intumescent strip and self-closer.
- Consumer unit: Should be labelled with every circuit clearly identified. The RCD (residual current device) should have a test button — press it and it should trip.
- Water temperature: Hot water at the taps should not exceed 48°C in bathrooms (thermostatic mixing valve requirement).
Documentation Checklist
Before or soon after completion, ensure you receive all of the following from the developer:
- NHBC Buildmark certificate (or equivalent warranty documentation)
- EPC (Energy Performance Certificate)
- Electrical Installation Certificate (BS 7671)
- Gas Safe certificate for the boiler installation
- Building Control Completion Certificate
- Boiler and appliance manuals and warranty cards
- Window and door guarantees (usually 10 years for frames, 5 for hardware)
- Central heating system details and commissioning certificate
- Paint colours and specification sheet (helpful for future touch-ups)
- Kitchen appliance manuals and warranty registrations
- Details of the property management company (if applicable) and estate charge schedule
- Adopted roads/drainage status and any Section 38/104 agreements
How to Report Your Findings
Once you've completed the walkthrough, compile your findings into a clear report for the developer:
Format Your Report
- Organise by room — kitchen items together, bathroom items together, and so on
- Number every item sequentially (Item 1, Item 2, etc.)
- For each item, note: the room, exact location, what the defect is, and attach the photograph
- Use clear, factual language: "Kitchen — worktop joint has 2mm gap at sink end" is better than "kitchen worktop looks wrong"
Submit to the Developer
- Email the report to the aftercare/customer care team — get the specific email address from your site manager
- Keep a copy for yourself and your records
- Ask for a written acknowledgement and a proposed repair schedule within 14 days
- Follow up if you don't receive a response — escalate to the site manager, then regional office
For detailed guidance on the reporting and escalation process, including email templates and warranty claims, see our complete snagging guide.
Quick Reference: Inspection Priority Order
If you're short on time, prioritise your inspection in this order:
- Safety items first — smoke detectors, CO detectors, window restrictors, staircase gaps, fire doors
- Water and plumbing — run every tap, flush every toilet, test every shower. Leaks cause the most damage if left
- Heating — check every radiator and the boiler while the system is running
- Kitchen and bathrooms — highest concentration of defects per room
- External areas — weather-facing defects (gutters, seals, brickwork) worsen if not addressed
- Loft — hidden defects here are the ones professionals find that most DIY inspections miss
- General room finishes — paintwork, doors, skirting, cosmetic items
After the Inspection
- Submit your snagging report promptly — ideally within 2 weeks of moving in
- Keep inspecting as you live in the property — new issues will appear as the house dries out over the first 12 months (shrinkage cracks, sticking doors, nail pops)
- Report additional defects as you find them — you have a full 2 years under the builder warranty period
- Consider a professional re-inspection at the 6 or 12-month mark to catch hidden defects you may have missed
- Keep all correspondence with the developer in writing — email, not phone calls
- If the developer refuses to fix legitimate defects, use your warranty provider's resolution process